Creating and Editing Drivetime Layers
You can create a drivetime from any outlet of from any point on the map.
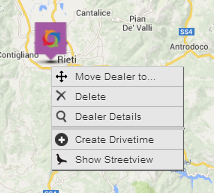
Create a drivetime from an outlet location.
To create a drivetime from an outlet location, first select the outlet and then right click. On the context menu, select 'Create Drivetime' A drivetime of 15 and 30 minutes will be created from the outlet location.
Create a drivetime from any map location
To create a drivetime from any location, simply right click your mouse on the map where you would like the drivetime to start from. From the context menu, select 'Create Drivetime'. A drivetime of 15 and 30 minutes will be created from the location that you selected on the map.
Editing Drivetime settings
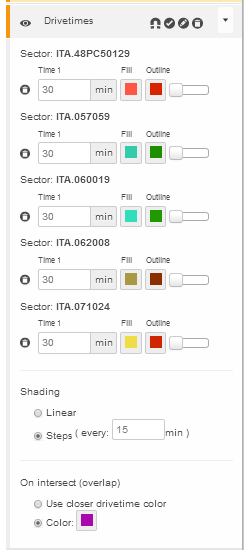
You can change the settings for any of the drivetimes that you create on the map. To get access to the settings, select the 'Drivetimes' map layer in the Map Layers Panel and open it up - the drivetime map layer settings can be seen below. Each drivetime has a time setting, a fill colour and outline colour setting and a delete button
Change the fill or outline colour by clicking on the fill or outline box and selecting the required colour for each. You can change the value of the drivetime. As a default, it is set to 30 minutes, but you can put any value into the box, up to a maximum of 360 minutes.
To delete an individual drivetime layer, click the delete icon (which is just before the drivetime value box) for the specific drivetime layer that you wish to delete.
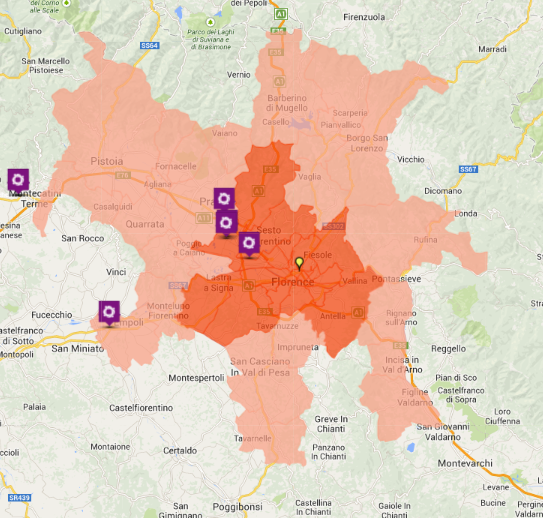
Drivetimes are shaded in 15 minute bands, but you can change the banding or steps by changing the option in the shading steps box towards the bottom, including the option to have a linear shading. Finally, you can define which colour to show if two or more drivetimes (from different locations) intersect using the settings at the bottom.