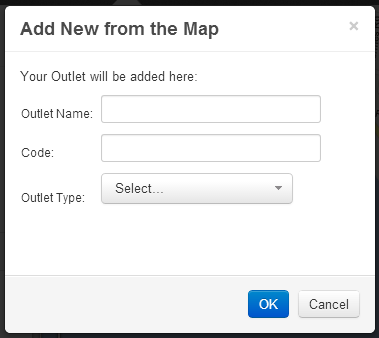
There are a number of ways to add an outlet to the map using Network Toolkit. The easiest way to do this is simply to right click the mouse at a specific location on the map and click on ‘Add new Outlet’. Complete the details of the dialog box and click OK. The outlet code you add must be a unique number for your retail network. If you have outlet categories set up and you wish to add one, select the checkbox to do so and then select the category that the outlet fits.
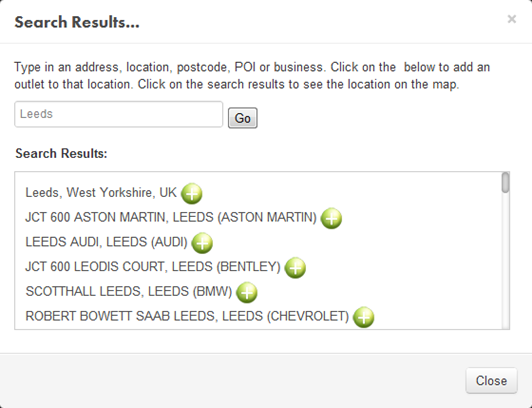
You can also add an outlet on any search results (also see section on Map Search), by clicking on the  symbol to the right of any search results. This will open up a dialog box to add an outlet:
In this way, you can specify any town, city, locality, postcode or street address.
You can also add an outlet at the location of any other POI (Point of Interest) such as a competitor location or business location:
Finally, you can add an outlet in the same location as a competitors outlet by displaying the competitor outlet on the map and then right-clicking on it.
When you add a new outlet, Network Toolkit will automatically add the address details for the new location, subject to an address being available.